This week I was asked to create a simple web form where customers could fill out a few fields, attach two files and submit it for review. The document with the information and attachments are saved into a Domino database, so it can be processed thought the Notes client by the internal staff.
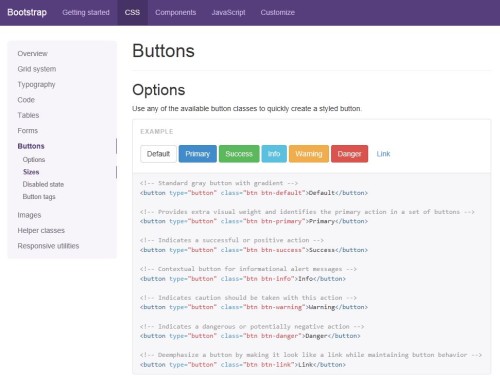
These days I mainly use Bootstrap (and jQuery) to design the webpages, since Bootstrap makes it very quick and easy to get a nice clean look of the page. Using jQuery allows me to do some nice manipulations of the DOM, hiding and showing sections as needed for example, or disable the submit button until all required fields have been filled out.
It has been a long time since I worked with the file upload control in Domino, and it was as ugly as I remembered it. But I knew I had seen some nice jQuery/Bootstrap file upload controls, so I located one that I liked in the Jasny plugin library. If you haven’t already, take a look at those components!
So how do I tie this control to the Domino file upload control? As so many times before, Jake Howlett and his excellent site CodeStore comes to the rescue. He wrote an article back in 2005 about how to fake a file upload control, and that code can be used as-is, and combined with the Jasny plugin.
Here is what my code looks like after doing that:
<div class="col-md-6">
<label>Producer Agreement</label>
<!-- File Upload -->
<div class="fileinput fileinput-new input-group" data-provides="fileinput" title="Attach file here">
<div class="form-control" data-trigger="fileinput">
<i class="glyphicon glyphicon-file fileinput-exists"></i>
<span class="fileinput-filename"></span>
</div>
<span class="input-group-addon btn btn-default btn-file">
<span class="fileinput-new">Select file</span>
<span class="fileinput-exists">Change</span>
<input type="file" name="%%File.1" class="required">
</span>
<a href="#" class="input-group-addon btn btn-default fileinput-exists" data-dismiss="fileinput">Remove</a>
</div>
</div>
On the second file upload control I just change the name to “%%File.2”. The form tag must have the encoding set to multipart/form-data, so this is what it looks like for me:
<form name="SubmissionForm" id="SubmissionForm"
action="AgencySubmission?CreateDocument" method="post"
enctype="multipart/form-data">
It all worked perfectly. I was able to attach the files and submit the form, and the files showed up in the Notes client. What I did not like was the dreaded “Form processed” message. I tried a few different things, using the $$Return field, etc. But nothing worked.
To make a long story short(er), and without diving too deep into details, I had the form setup to render as HTML, not as a Notes form, thus using ?ReadForm to display it. But when I changed it to Notes on the form properties, the Domino server added it’s own Javascript code to submit the form (in addition to extra HTML). I found out a way to trick Domino to “hide” that Javascript code, so only my jQuery/Javascript code was sent to the browser.
Then I wrote my own code to do a HTTP POST submission of the form as multipart/form-data:
$('form#SubmissionForm').submit(function(event){
  // Disable the default form submission
  event.preventDefault();
  // Gat all form data
  var formData = new FormData($(this)[0]);
  $('input').each( function() {
    formData.append($(this).attr('id'),$(this).val());
  });
  // Submit form to Domino server using specified form
  $.ajax({
    url: 'AgencySubmission?CreateDocument',
    type: 'POST',
    data: formData,
    async: false,
    cache: false,
    contentType: false,   // Important!
    processData: false,   // Important!
    success: function (returndata) {
      window.location = 'SubmissionThankYou.html';
    }
  });
  return false;
});
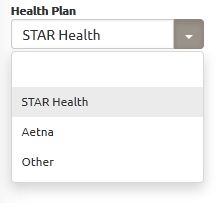
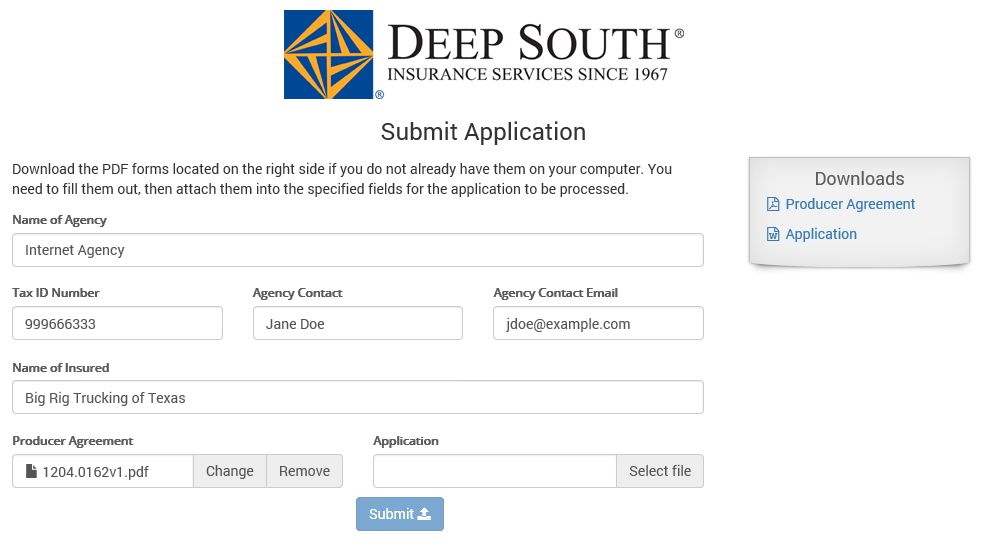
That’s it! It worked like a charm. And this is what the final result looks like:
Of course, if you are able to use XPages, there are nice file upload controls there that you can use.