TexasSwede
texasswede@gmail.com
  • About this blog
  • My Website
  • My Resume
  • XML Export Tool
  • Photos

Category Archives: Web Development

Some useful jQuery plugins – Part 1

Posted on July 26, 2013 by Karl-Henry Martinsson Posted in Javascript, jQuery, Web Development 4 Comments

I often find cool and (sometimes) useful jQuery plugins, so I want to share a few that I like. I plan to share more in the future.


Adipoli jQuery Image Hover Plugin

Includes several different effects to highlight images as the mouse hovers over them.

Adipoli Hover jQuery

http://cube3x.com/demo/adipoli-jquery-image-hover-plugin/


jQuery File Upload

File Upload widget with multiple file selection, drag&drop support, progress bars and preview of images, audio and videoy. Supports cross-domain, chunked and resumable file uploads and client-side image resizing.

jquery-upload

https://github.com/blueimp/jQuery-File-Upload


iCheck

Customized checkboxes and radion buttons for your forms.

iCheck

http://damirfoy.com/iCheck/


Chosen

A plugin to make dropdown-boxes (especially long ones) easier to use. I looked at using this in a project, but ultimately opted to use another plugin, for different reasons. Chosen is still a good tool.

Chosen

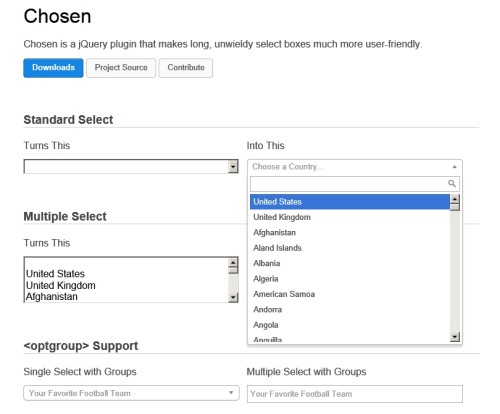
http://harvesthq.github.io/chosen/


MagicSuggest

This is the plugin I selected over Chosen. The content of the dropdown can be supplied using an Ajax call, returning JSON, and there are a large number of configuartion options. The plugin support filtering and type-ahead, as well as many other useful functions.

MagicSuggest

http://nicolasbize.github.io/magicsuggest/
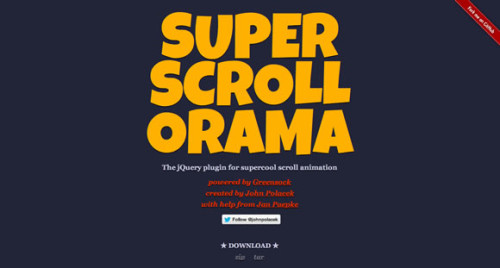
 

SuperScrollorama

A jQuery plugin for scroll animations.

scrollorama

http://johnpolacek.github.io/superscrollorama/
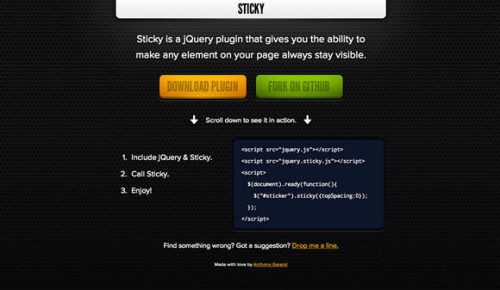
 

Sticky

Sticky is a jQuery plugin that gives you the ability to make any element on your page always stay visible.

sticky

http://stickyjs.com/


jQuery – An Overview

Posted on July 19, 2013 by Karl-Henry Martinsson Posted in Frameworks, Javascript, jQuery, Notes/Domino, Programming, Web Development 1 Comment

Yesterday my boss asked me about a simple overview/tutorial explaining jQuery, Bootstrap and some other web technologies, and how they work together. I decided to also post the result on my blog, so here is the first part. You may recognize some code from a previous blog entry.

jQuery is a currently very popular Javascript framework/library. There are other ones, like Dojo (used by IBM in XPages) and YUI (originally developed by Yahoo), but jQuery is right now at the top when it comes to usage.
jQuery contains the plumbing behind the scene, it contains functions to let the different elements on the page talk to each other and interact, for example trigger events on click or change. It also have functions to hide and show elements (either directly or fade in or out).

One of the big benefits with jQuery is that many functions are much easier to do than in traditional Javascript. It also addresses browser inconsistency, so you don’t have to write different code for Firefox and Internet Explorer. jQuery is Javascript, just packaged in a nice library and simplified. There are also UI components and mobile components, found in jQuery UI and jQuery Mobile. Here are a couple of examples, comparing plain Javascript with jQuery: http://blog.jbstrickler.com/2010/06/vanilla-javascript-vs-jquery/.

jQuery ties into the DOM (Document Object model) of the browser/webpage in a very easy-to-use way. The way elements are addressed is identical to how you do it in CSS, using . (dot) for classes and # for individual elements.

It is not hard to start with jQuery. You do not even have to host the library on your own server, several companies (including Microsoft and Google) host jQuery (as well as other libraries and frameworks) in what is called a CDN (Content Delivery Network). You simply include a line of code in the head section of your HTML, telling the browser to load jQuery from a specified location, and you are all set:

<head>
    <title>Hello, jQuery</title>
    <script src="//ajax.googleapis.com/ajax/libs/jquery/1.8.1/jquery.min.js"></script>
</head>

Notice that you don’t use http: or https: at the start of the URL. This is a trick that makes it work both on a http or a https site. However, if you have the code locally in the file system on your computer (like many do before uploading the html file to a server), you must add http: at the beginning for it to load.

Let take a look at our first jQuery example. Below we have a very simple piece of HTML code:

<body>
    <button id="btnSave">Save</button>
    <div id="messageBox"></div>
</body>

What we want to do is that when the button is clicked, a message should be displayed in the div with ID messageBox. That is done with the following piece of jQuery:

$("#btnSave").click( function() { 
    $("#messageBox").html("You clicked the Save button."); 
});

What this do is to replace everything inside the div with the text/HTML code we specify. The second line is the code to execute when the event specified triggers/fires. You can put triggers on almost any element, and depending on the element type, you have different triggers.

The code between the first and last curly brackets { } is being executed when the event is triggered. As you can see, I have the code I showed earlier nested inside this code. What all this does is to wait until the page is loaded, then start creating event triggers.

There are two schools when it comes to where you put the jQuery code. Soem developers prefer to put the code inside <script> tags at the end of the page, after all HTML code and right before </body>. That is is so that the code is not executed until the page (and all the elements on it) have been loaded.

There is another way to do it, as well. This one allows you to put the code in the <script> section of the header section, but it us using jQuery to not load any code until the page has finished loading:

$(document).ready(function () {
    // Setup the element with id "btnSave" to react on click
    $("#btnSave").click( function() {
        // When clicked, set the innerHTML of the element with
        // id "messageBox" to the specified html string.
        $("#messageBox").html("You clicked the Save button.");
    });
});

The important thing is that you can not start put events on elements until they have been created on the page, or nothing will work.

One of the really cool features with jQuery is how easy it is to call another page/url and get something back. This is commonly called Ajax (Asynchronous Javascript and XML), even if it these days more often than not involves getting JSON back instead of XML.
JSON stands for Javascript Object Notation and is a way to package data in the same way you would do if you created a Javascript object. A simple example would look like this:

{
    "FirstName":"Karl-Henry",
    "LastName":"Martinsson",
    "Department:"IT"
}

I can now assign the object to a variable (let’s call it employee) and I can then access the values using regular Javascript:

alert(employee.FirstName + " " + employee.LastName + " works in " + employee.Department);

This ease of parsing makes JSON ideal to use to retrieve values from a data source and display them on a webpage, using Javascript.

Let’s look at a more complicated example. I will call a URL on a server, which will trigger an agent to run to retrieve data from a database and return it in HTML format. This particular URL points to a Domino agent written in Lotusscript, but it could be written in any language supported by the server, like php. For a Domino server, you could also use an XPages agent.

Here is the Javascript code to call a URL and put the content returned into a element on the web page:

function loadProgressNotes(clientunid) {
    $.ajax({
        url: "/mydatabase.nsf/GetProgressNotes?OpenAgent",
        data: {"ClientUNID":clientunid,"Start":"1","Count":"10"},
        cache: false
    }).done(function(returndata) {
        $("#progressNotes").html(returndata);
    });
}

I broke this code out as a separate function, as I need/want to call it in several places. The function just contains one single jQuery function call, .ajax(). I pass a Javascript object to the function, containing the data needed by the function. Many jQuery functions works like this, you pass a Javascript object with arguments instead of passing a large number of individual arguments. You can do the same in Lotusscript, by passing an object or a custom data type to a function instead of numerous arguments.

In this particular case, I am calling .ajax() with 3 arguments. The first one is the URL to go to, the second one is the data to send to that URL, and the last one is a flag telling jQuery to add a cache buster to the end of the URL it constructs. If I would not add that, and I had recently made the same call, I would get old data, as web servers and browsers cache data for performance reasons.
The interesting thing in the code above is perhaps that the data I pass to the URL are itself a Javascript object, so we have a Javascript object where one of the elements is another object.

So what happens is that jQuery performs a call to www.domain.com/mydatabase.nsf/GetProgressNotes?OpenAgent&ClientUNID=something&Start=1&Count=10&_15614312653

The last number is the cache buster, simply a timestamp (milliseconds since midnight, Jan 1, 1970).
The program/agent on the server reads the arguments, performs whatever database lookup it needs, and generates HTML based on that. This HTML is returned by the .ajax() call in data above. The jQuery call is sitting in the background and waiting for the agent to return the data. When this is done, the .done() event is triggered.
In that event, I have written some jQuery code to update the contents of the element called “progressNotes” with whatever the AJAX call returns, in this case some HTML.

It may be more common to have the agent return JSON and parse it, putting different values into different elements on the page. Here is an example, where I go through all the input fields and text area fields on a HTML form and collect the field values/contents for any of the fields having the custom attribute called notesfield. The value of the attribute is the field name in the Domino database, making it very easy to send the data to the correct place on the server.  A typical input field could look like this:

<input notesfield="FirstName" type="text" value="" placeholder="First Name">

Below is the Javascript code, using jQuery to update the record in the Domino database and return JSON that will indicate success or failure, as well as a custom message that will either explain the reason for failure or a message that the document was updated.

var json = new Object();

myjson["ClientUNID"] = "E7A2D820EE10123C86257BAD0056A5F4";

$('input[notesfield]').each(function() {
    fieldname = $(this).attr("notesfield");
    fieldvalue = $(this).val();
    myjson[fieldname] = fieldvalue;
});

$('textarea[notesfield]').each(function() {
    fieldname = $(this).attr("notesfield");
    fieldvalue = $(this).val();
    myjson[fieldname] = fieldvalue;
});

$.ajax({
    url: "/mydatabase.nsf/UpdateClient?OpenAgent", 
    data: myjson,
    cache: false
}).done(function(returndata) {
    if (returndata.status=="Error") {
        $(".errorMessageClient").html("Error! " + returndata.msg).show();
    } else if (returndata.status=="Success") {
        $(".successMessageClient").html("Success! " + returndata.msg).show();
    });
});

As you can see, it is easy to retrieve values from the JSON you get back.

That’s all for now. Next time I will talk about Bootstrap.

Free Bootstrap tools

Posted on June 3, 2013 by Karl-Henry Martinsson Posted in Frameworks, HTML/CSS, Javascript, Web Development Leave a comment

I started using Bootstrap a while back, and really enjoy the fact that I quickly can build a website/application using the framework. But there is always room for improvement. I found some useful tools that will help you, if you are using Bootstrap, to build your pages even quicker.

The first resource is Divshot, a online tool/interface builder where you can design your pages, then get the HTML code and insert it into your page. I just started using it this weekend, but it is a brilliant tool, easy to use and very helpful. It’s currently in free beta, you just need to register.

DivShot editor

DivShot editor

Update: DivShot is now a commercial product, but you can use it for free if you just have one single project.

Bootbox.js is a Javascript library that help you create programatic dialog boxes.

prettyCheckable replaces the standard checkboxes with nicer looking ones.

Datepicker for Bootstrap is (as the name indicates) a datepicker, made to match the Bootstrap look.

jQuery Form Validation is using the Bootstrap stylesshet to make it match the rest of the framework. I haven’t tried this one yet, but it looks very useful.

Fuel UX is another way to extend Bootstrap with additional controls. Very nice looking!

Lavish is a cool online tool that takes an image and creates a color scheme based on it for use in Bootstrap.


You can find these tools and more here.

How to set doctype on Notes forms

Posted on April 11, 2013 by Karl-Henry Martinsson Posted in Frameworks, IBM/Lotus, Notes/Domino, Web Development 2 Comments

When redesigning my website to use Bootstrap, I ran into a problem. The navbar (meny) did not render correctly in Internet Explorer 9, despite looking perfect in Firefox and Internet Explorer 10. There are several discussions about this problem on StackOverflow and other forums, and the solution is simply to add <!DOCTYPE HTML> on the first line of the HTML code.

However, IBM Domino automatically adds a different doctype string, and there is no database or form property to change/set the correct value. But there is actually a way, and it is not very complicated.

Simply create a computed for display field called $$HTMLFrontMatter. Make it hidden from web browsers, and in it you enter a formula that will give you the desired doctype. I simply put “<!DOCTYPE HTML>” in there, and it worked perfectly. Also make sure “Use Javascript when generating pages” is turned off.

This way to modify the HTML generated is documented in the online help. It was added in Domino 8.

Show and Tell – Dynamic Web Calendar

Posted on November 27, 2012 by Karl-Henry Martinsson Posted in Frameworks, IBM/Lotus, Javascript, Lotusscript, Notes/Domino, Programming, Web Development 1 Comment

In this post in the developerWorks forum, Andy Herlihy is asking about how to create a small calendar that can be embedded into an existing intranet website. As Carl Tyler points out, Andy could simply use Dojo.

However, this is a good example to show some jQuery combined with the power of IBM Lotus Domino.  Lets’ break it down into a few smaller steps.

The first one is to create a Domino web agent that will take the current date and build a calendar for that month. There will be no links or javascript code in the HTML generated, just plain HTML code, with some id attributes to make it easy to address different cells later.

The next step is to create a very simple webpage, with some Javascript to load jQuery and set up the calendar to detect clicks. The clicks will cause another call to the Domino server, this time to a view using RestrictToCategories to only get the entries for the specified date. The entries are returned as HTML and through jQuery they are displayed in a div on the webpage. We also want to add a little bit of CSS to make the calendar pretty. The CSS also lives on the HTML page.

Finally we create the view, it’s associated view template form and a form to create some entries that we can use for testing.


Let’s look at the code. First the Domino web agent. It should be pretty self explanatory:

%REM
    Agent WebCalendar
    Created Nov 26, 2012 by Karl-Henry Martinsson/Deep-South
    Description: Returns HTML for a calendar for current month
%END REM
Option Public
Option Declare

Sub Initialize
    '*** Used to get URL params
    Dim session As New NotesSession
    Dim webform As NotesDocument
    Dim urlstring As String
    Dim urlarr As Variant
    Dim urlvaluename As Variant
    Dim urldata List As String
    Dim webservername As String
    '*** Agent specific
    Dim startDate As NotesDateTime
    Dim endDate As NotesDateTime
    Dim i As Integer
    Dim j As Integer
    Dim startweekday As Integer
    Dim thisMonth As Integer
    Dim currDate As Double
    Dim cellclass As String

    Set webform = session.DocumentContext
    '*** Calculate path for this database, for image/icon file references later
    webservername = webform.GetItemValue("Server_Name")(0)
    '*** Remove leading "OpenAgent"
    urlstring = StrRight(webform.Query_String_Decoded(0),"&")

    If urlstring <> "" Then
        '*** Get all params passed to agent
        urlarr = Split(urlstring,"&")
        For i = LBound(urlarr) To UBound(urlarr)
            urlvaluename = Split(urlarr(i),"=")
            urldata(urlvaluename(0)) = urlvaluename(1)
        Next

        If IsElement(urldata("date")) = False Then
            urldata("date") = Format$(Now(),"mm/dd/yyyy")
        End If
    Else
        urldata("date") = Format$(Now(),"mm/dd/yyyy")
    End If

    '*** Get first and last date of current month
    Set startDate = New NotesDateTime(Format$(urldata("date"),"mm/01/yyyy"))
    Set endDate = New NotesDateTime(startdate.DateOnly)
    Call endDate.AdjustMonth(1)
    Call endDate.AdjustDay(-1)

    currDate = CDbl(CDat(startDate.DateOnly))
    startweekday = Weekday(Cdat(startDate.Dateonly))

    '*** HTML header
    Print "Content-type: text/html" ' & CRLF
    Print |<table class="calendar">|
    '*** Create calendar header with weekdays
    Print |<tr><td colspan=7 class="labelMonthYear">| + Format$(CDat(startDate.DateOnly),"mmmm yyyy") + |</td></tr>|
    Print |<tr class="calendarHeader">|
    Print |<td>S</td><td>M</td><td>T</td><td>W</td><td>T</td><td>F</td><td>S</td>|
    Print |</tr>|

    '*** Build rows for the weeks
    For i = 1 To 6
        Print |<!-- Start row | & i & | -->|
        Print |<tr class="calendarRow" id="calendarRow| & i & |">|
        For j = 1 To 7
            If j < startweekday And i = 1 Then
                Print |<td class="emptyCell"></td>|            ' Blank cell before dates
            ElseIf currDate >= CDbl(CDat(startDate.DateOnly)) And currDate <= CDbl(CDat(endDate.DateOnly)) Then
                cellclass = "calendarCell"
                If j = 1 Then
                    cellclass = cellclass + " sundayCell"
                End If
                If j = 7 Then
                    cellclass = cellclass + " saturdayCell"
                End If
                Print |<td class="| + cellclass + |" id="| + Format$(CDat(currDate),"yyyy-mm-dd") + |">|
                Print Day(CDat(currDate))    ' Day number
                Print |</td>|
                currDate = currDate + 1
            Else
                Print |<td class="emptyCell"></td>|            ' Blank cell after dates
            End If
        Next
        Print |</tr>|
        Print |<!-- End row | & i & | -->|
        Print ""
        If currDate >= CDbl(CDat(endDate.DateOnly)) Then
            Exit For
        End If
    Next
    Print |</table>|
End Sub

I am setting the id attribute on the cells to the date in yyyy-mm-dd format, and I will also use that in the categorized view that will later use. Using ISO 8601 for dates have several advantages, in our case particular because we don’t have to worry about the / character that will mess up the URL to the Domino view we will call later.
I also use class attributes on the cells, so CSS can be used to easily format the calendar.
Next we create the web page where we will insert the calendar and also display the entries for any selected day. We load jQuery from Googles CDN, and after the DOM is fully loaded by the browser, we make an ajax call to the Domino server and get the HTML of the calendar back.

After the calendar is retrieved, we use jQuery to trigger a Javascript function on click on any date cell. The code will detect the id of the cell, which just happens to be the date, and then performs another ajax call to teh Domino server, this time to the view to return all entries for the selected date. The data returned is then inserted into a div.

<!doctype html> 
<html>
  <head>
    <meta http-equiv="Content-Type" content="text/html; charset=UTF-8" />
    <title>Calendar Test</title>
    <script src="http://ajax.googleapis.com/ajax/libs/jquery/1.8.1/jquery.min.js"></script>
</head>
<script>
    // The following function is executed after page is fully loaded
    $(document).ready(function () {
        var remoteURL = "http://www.texasswede.com/test/calendar.nsf/WebCalendar?OpenAgent";
        var viewURL = "http://www.texasswede.com/test/calendar.nsf/CalendarView?OpenView";
        // Load the calendar HTML from our Domino server using ajax
        $.get(remoteURL,
        function(data) {
                // Update div with id 'ajaxCalendar' with HTML calendar from server
                $("#ajaxCalendar").html(data);
                // Set all calendar cells to trigger on click
                $(".calendarCell").each( function(i) { 
                        // Get the id (i.e. selected day) of the cell clicked
                        var id = $(this).attr("id");               
                        $(this).click( function() {
                        // Call view on Domino server and return entries for selected day
                        $.get(viewURL, { RestrictToCategory: id },
                                function(data) {
                                        // Put list of entries in viewData div
                                        $("#viewData").html(data);
                                 });
                        });
                } );
        });
});
</script>
<style>
    td.calendarCell {
        border: 1px dotted black;
        height: 30px;
        width: 30px;
        text-align: center;
        vertical-align: middle;
    }
    td.emptyCell {
        background-color: #EFEFEF;
        height: 30px;
        width: 30px;
    }
    td.sundayCell {
        background-color: #DDDDDD;
        color: #DD0000;
    }
    td.saturdayCell {
        background-color: #DDDDDD;
    }
    .labelMonthYear {
        font-family: Arial;
        font-size: 12pt;
        text-align: center;
    }
  </style>
  <body>
    <div id="ajaxCalendar"></div>
    <br>
    <div id="viewData"></div>
  </body>
</html>

What’s left to do to get this all to work is to create the following Domino design elements:

  1. A form to use for entering calendar data. I called it “Calendar Entry”, and just put two fields on it, ‘CreatedDate’ (computed for display, using @Now) and ‘Title’ (text field).
  2. A view called ‘CalendarView’, with two columns. The first one is categorized and is displaying the created date in yyyy-mm-dd format, while the second one is displaying the title field and adding an HTML line break after. The view is set to treat content as HTML.
  3. A form called ‘$$ViewTemplate for CalendarView’, set to treat form as HTML. The form only contains an embedded view element, pointing to ‘CalendarView’, and it is set to return data as HTML as well.

This is the formula I used in the first column of the ‘CalendarView’ view:

y:= @Year(CreatedDate);
m:= @Month(CreatedDate);
d:= @Day(CreatedDate);
yyyy:=@Text(y);
mm:=@If(m<10;"0";"") + @Text(m);
dd:=@If(d<10;"0";"") + @Text(d);
yyyy + "-" + mm + "-" + dd

And this is what it looks like when finished:

This is just one example of how you can combine Domino (agents, views and forms) with jQuery in order to integrate Domino based data into your web applications.

Happy coding!

Using jQuery to emulate Notes hide-when

Posted on November 6, 2012 by Karl-Henry Martinsson Posted in Frameworks, Javascript, Notes/Domino, Web Development 1 Comment

We have all built applications in Lotus Notes where we use the value of a checkbox, radio button or dropdown box to show or hide additional fields, like you can see in this clip.

But the hide-when formula will not work this way on the web. The Domino HTTP stack will simply render the page before sending it to the browser, and even if you make a selection in the browser, the hidden section will not display or vice versa.
So what can you do? One easy way is to use jQuery (or Dojo, if you rather fancy that). You can then detect if a checkbox/radio button is clicked on or if a dropdown box is changed. Then you read the value of the button/box and hide/show the content you like.


In this example, you can also see that that one of the dropdown boxes actually switch which dropdown box to display next to it, you can see that the available choices are different, in addition to performing the more visible hiding of the last row when recommendations is not set to “n/a”.
So how do you actually do this? It is fairly easy.
First you add a reference to the jQuery library to the HTML Head Content section of the form. Remember that you need to prefix any quote marks with a \ when you put it in as a string. Here I am calling the Google-hosted jQuery library:
<script src="http://ajax.googleapis.com/ajax/libs/jquery/1.8.1/jquery.min.js"></script>
Next, remove any hide-when formulas from the form you are going to expose on the web. That is important, since the Domino server will otherwise not render all the HTML you need. Then give each element you want to hide a unique id. You are probably using tables to create the layout you want, then you can use the table cell id to address the element.


In this case, I give the cell containing the label the id “ReasonNALabel” and the cell containing the dropdown box the id “ReasonNA”. The field ‘Recommendation’, which is the one where we are detecting the click and if it has the value “n/a” should display the two cells below it, has an id of “Recommendations”.
One more thing, we want to detect the value as soon as the page is loaded, and display/hide the section accordingly. I will break out the code that perform the check of the value and does the hide/show, so I can call one function insted of duplicating the code.
 

$(document).ready( function () {
    // Check value and do initial show/hide after page is finished loading
    refreshRecommendations();
    // Set trigger for click on radio button to call function
    $("input[name='Recommendations']").click( function() {
        refreshRecommendations();
    });
});

function refreshRecommendations() {
    var checked = $('input[name=Recommendations]:checked').val();
    if (checked == "n/a") {
        $("#ReasonNA").show();
        $("#ReasonNALabel").show();
    } else {
        $("#ReasonNA").hide();
        $("#ReasonNALabel").hide();
    }
}


If you want to check the value if a checkbox, use  $(“#checkboxID”).is(“:checked”) and to check the value of a dropdown box, use $(“#dropdownboxID”).val(). For the dropdown box, use .change() instead of .click(), otherwise the code is identical.


That is it, a few lines of jQuery to duplicate your hide-when functionality on the web.
Bonus tip: If you want the ítems to fade in and out gradually, you can use jQuery for that as well. You just replace .show() with .fadeIn(‘slow’) and .hide() with .fadeOut(‘slow’). Now you get a nice slow (about 1 second) fade effect instead of instant change.
You can also set the duration of the fade in milliseconds instead, for example .fadeIn(500) for a half-second fade. Another neat thing is that you can define a call-back function to execute after the fade is done. Below is an example of that, where one div is faded out in 750 milliseconds. When that is done, another one is faded in (for half a second) and finally a message is displayed when everything is done.
$("#Section1").fadeOut(750, function() {
    $("#Section2").fadeIn(500, function() {
        alert("Done.");
    });
});

Reminder – Great icon set for free!

Posted on November 4, 2012 by Karl-Henry Martinsson Posted in Blogging, Programming, Web Development 7 Comments

Two years ago I wrote about the FamFamFam Silk icons, a free set of 1000 icons that I use. I still use them in all my applications, and have even modified a few of them to suit my purposes. They come as PNG files, but I have converted them to GIF format so I can use them in for example Notes action buttons.

If you downloaded my generic database template, which I posted about two years ago as well , you have the GIF version of all the icons as image resources.

So if you haven’t taken a look at those icons, you should. Few things help your application or website to look professional as a set of consistent looking icons. And yes, it works in Xpages. You just have to add a little piece of CSS to make it look good, as Per Henrik Lausten told me when I posted about that in StackOverflow.

The magic code is:  .lotusBtn img {   margin-right: 10px; }
This will give you 10 pixels between the icon and the label. It might be enough with 5 or 6 pixels, depending on what the desired look of the page is.


Replace images on web page using jQuery

Posted on October 31, 2012 by Karl-Henry Martinsson Posted in Frameworks, Javascript, Notes/Domino, Programming, Web Development 3 Comments

Last week I encountered a situation where I wanted to replace images on a Domino generated webpage. I am sure you all know what doc links look like by default when rendered by the Domino HTTP task:

Domino Default Icons (click for larger version)


By adding a few lines of jQuery to the form, you can manipulate the image source, as well as the CSS class and other attributes. This allows you to modify a page served by the Domino HTTP task almost as much as you like.

Below is the code I used to modify what you see above into something that I found a little bit nicer.

        $("img").each( function() {
        var t = $(this);
        imgicon = t.attr("src");
        if (imgicon == "/icons/doclink.gif") {
           t.attr('src', '/applications/losscontrol.nsf/icon_picture.gif');
           t.addClass('photoicon');
        } 
        if (imgicon.indexOf("Attachments") > 1 ) {
           t.attr('src', '/applications/losscontrol.nsf/icon_attach.gif');
           t.addClass('attachmenticon');
           t.attr('height','16');
           t.attr('width','16');
        } 
    });
    $("a").each( function() {
        var t = $(this);
        url = t.attr("href");
        if (url.indexOf("$FILE")>0) {
           t.removeAttr("style");
           t.addClass('attachmentLink');
           t.outerHTML = t.outerHTML + "<br>";
        }
    });
    var plink = $('#photolinks').html();
    plink = plink.replace(/<br>/i,'');
    plink = plink.replace(/<\/a><font\b[^>]*>/gim,'<span class="photoLink">');
    plink = plink.replace(/<\/font>/gim,'</span></a>');
    $("#photolinks").html(plink);

    var alink = $('#attachmentlinks').html();
    alink = alink.replace(/<\/a>/ig,'</a><br>');
    $("#attachmentlinks").html(alink);


What I am doing is to loop through all img tags on the page, and identify the ones that are doc links (using the file name for the icon). I replace the src attribute of those links with a different icon I added as an image resource to the database. I then set the class name for the link, so I can manipulate the look using CSS.

I also look for any src attribute containing the field name “Attachments”, which is where the attachments (if present) are located. I change the icon from the one generated by Domino to another image resource in the database.

The next section of the code will loop through all anchor tags and check if the link includes “$FILE”, indicating it is an attachment. If that is the case, I remove the Domino generated style attribute, set a class name and append a line break to the end of each link.

I then perform some string replacements to remove the font tags that Domino generate automatically when rendering rich text fields. I replace the font tags with a span (containing a class name) so I can style the look of the link later, and also move the </a> tag to after the link text. The last thing I do is to add a line break after each attachment link.

Here is the result:

Domino jQuery Icons (click for larger version)


Hope this can help anyone. And if you wonder, I am using the fieldset tag to create the box around each set of icons.

Domino jQuery

How to start with jQuery

Posted on October 26, 2012 by Karl-Henry Martinsson Posted in Frameworks, HTML/CSS, Javascript, Web Development Leave a comment

Lately I have been working on several web applications, both as hobby projects and at work. I started using YUI3 a few years ago as a Javascript framework, and I liked it. But I kept hearing about jQuery, and the times I saw code snippets, I was intrigued. It looked different, but at the same time jQuery seemed very powerful and efficient.

So a while back I started looking closer at jQuery, and I found that it was extremely easy to learn. One need a decent understanding of HTML and the browser DOM (Document Object Model), as well as Javascript knowledge. Add some CSS to that, if you want the page to look good as well, and you are set.

So how do you start using jQuery? The easy way is to take advantage of companies like Google and Microsoft who are hosting different frameworks (including jQuery) on their servers for public use. You don’t have to worry about downloading and hosting it yourself, and you can get started in just minutes.

You add code to your page to utilize jQuery, then add some script. You have to allow the browser to wait for the webpage to fully load before you can start doing things, and this is done using $(document).ready(). When that event is triggered, the code you have added there will be executed.

It is very easy to address elements on your webpage. If I have an element (could be a button, a span/div section, a link or even an image) with the id “messageBox”, I can address it like this: $(“#messageBox”). I then have different properties and methods for that element.

But I have always believed in “show me the code”. I created a very simple demo. The webpage contains a button and a div where we want to display a text when the button is clicked. I have some CSS to make the text look nice, and a few lines of jQuery code to do the work.

<html>
  <head>
    <title>Hello, jQuery</title>
    <script src="http://ajax.googleapis.com/ajax/libs/jquery/1.8.1/jquery.min.js"></script>
  </head>

  <script>
  // The following function is executed after page is fully loaded
  $(document).ready(function () {
    // Setup the element with id "btnSave" to react on click
    $("#btnSave").click( function() {
      // When clicked, set the innerHTML of the element with
      // id "messageBox" to the specified html string.
      $("#messageBox").html("You clicked the <strong>Save</strong> button.");
      $("#messageBox").addClass("statusMessage");
    });
  });
  </script>

  <style>
    .statusMessage {
      font-family: Arial;
      font-size: 0.9em;
      color: #AA0000;
    }
  </style>

  <body>
    <button id="btnSave">Save</button>
    <div id="messageBox"></div>
  </body>
</html>

That’s it. Try it yourself, paste this code into a text file and call it jQuery.html, then open it in your browser.

Result of jQuery.html

The result. Click for a larger version.

Now when you understand the basics, you can learn more advanced things. I am using jQuery to very easily perform Ajax calls, even calling Lotusscript web agents to return data from a Domino database to my webpage. I also use it for all kinds of dynamic updates to webpages.

A while back I started on a Domino-based web chat as a hobby project. I started building it using YUI3, but after finishing the initial landing page, I started using jQuery on the actual room pages. The other night I simply ripped out the YUI3 code and replaced it with (much less) jQuery code. It took my just an hour or two. The site/chat is currently in Swedish, but I plan to translate it to other languages, and I will blog more about this project soon. Feel free to try it out, or just look at the source code for the pages. I am sure you will very quickly understand how it works. On that page I use jQuery to call server agent to return the number of users (and their names) present in the different rooms. I also check values in field, as well as update fields, hiding/showing elements on the page depending on field values, etc.
I also use a jQuery plugin to display bubbles with information (pulled in real time from the Domino database using a web agent) when hovering over the count of users in a given room.


YUI3: Powerful Javascript Framework

Posted on May 15, 2012 by Karl-Henry Martinsson Posted in Frameworks, Old Blog Post, Web Development Leave a comment

Last week I came up with a small side project. It was basically a simple web chat, working pretty much like the comments on a blog. I decided to build this as a classic Domino application, not using Xpages. I started development Wednesday mid-afternoon, and the application needed be done Thursday evening, and I of course had my regular job to do. So I could not justify spending the time I needed to learn doing it in Xpages, and then try to write CSS to get it to look like I wanted it. So there you have the reason for why I did not use Xpages.

I decided to take a look at YUI, the framework developed by Yahoo. The latest version is version 3, and it is really nice and powerful. I looked into in, and realized that I could do things very quickly, getting the same functionality as using Xpages (partial refresh  or page, etc) in just a few lines of code.

So what did I need for my application? I started with a blank Notes database. I created a page, which is where all the action would take place. On the page I created a header section (logo), a content section (where the messages/chat would be displayed) and a form section where I put a few fields for the users to fill out. The fields were name/handle, email, (optional) website and lastly the message to send. I also put two images there, one to use as a submit button, and one to refresh the chat content without having to submit a text.

Bloggfika Webchat using YUI3

I added some javascript at the top of the page, loading YUI3 (hosted by Yahoo, I did not even have to download anything):

 
<script src="http://yui.yahooapis.com/3.5.1/build/yui/yui-min.js"></script> 

The next step was to add some code for the actual logic on the page. YUI works by binding functions to events on elements on the page. I wanted to bind function functions to the onClick event of the two buttons, "submit" and "refresh". To avoid this blog entry to be too long, I will just show the code behind the refresh button:

 Y.one('#refresh').on('click', function(e) {        e.preventDefault();        var contentcell = Y.one("#contentCell");        if (contentcell) {            var currentTime = new Date();            Y.one('#refresh').set('src','webchat.nsf/ajax-loader-150.gif'); var args = &refresh=true&datetime=" + currentTime.getTime();            contentcell.load("webchat.nsf/SendText?OpenAgent" + args,"", function()  {                Y.one('#refresh').set('src','webchat.nsf/refresh.png');            } );        }    });

This code gets a reference to the first element with the id "refresh" using Y.one(), then bind a function to the "click" event. The function is defined right there, and it will do a couple of things. First it get a reference to the element (in this case a DIV) with the id  "contentCall". I check if it was found, and if so I get the current time (get a unique number). I then change the image of the refresh element to a spinning "loading" icon.

The next line is the coolest one. In one line of code I perform an Ajax call to an agent on the Domino server, and put the returned data into the contentcell element. Finally, after the server returns teh data, another function is called, which restored the refresh button to the original image.

The agent is written in Lotusscript, and it just read the existing chat entries from a database and output it using the print statement as HTML. I add the times in seconds as a second argument, just to get each call to be unique. Otherwise the returned data might be cached on the server and the user would not get the latest data.

The submit action is similar, the difference is that it read the values from the different fields on the form and submit them to the same agent as name-value pairs. The agent will detect that data is being passed to it, and will store the values in a new Notes document, then return HTML for all entries just like the refresh.

As you can see, a complete Ajax call (calling the server, waiting for data, gettingthe data back, replacing the content of an element on a page to perform a partial refresh and triggering additional code when the data has been returned) is just one line of code. Could not be much easier!

The actual application got more functionality, I check for certain required fields already in the web client, using javascript, I load up the content when the page is first opened (so the user does not have to press refresh to see anything), etc. The webchat is also just open specific times, when it is closed a message is displayed about when it will be open next, etc. The open/close is set by a Notes configuration document. Note: Do not use profile documents to store items for a web application, they get cached on the server and you will probably not get the latest data…

I am impressed with how easy and quick it was to build this application, using a compbiantion of classic Notes and a powerful javascript framework.


Stack Exchange

profile for Karl-Henry Martinsson on Stack Exchange, a network of free, community-driven Q&A sites

Recent Posts

  • Domino 14 is now available
  • Domino 14 Early Access Program
  • Announced: Engage 2024
  • Integrate Node-RED with Notes and Domino
  • Notes and Domino v12 is here!

Recent Comments

  • Theo Heselmans on Announced: Engage 2024
  • Lotus Script Multi-thread Message Box [SOLVED] – Wanted Solution on ProgressBar class for Lotusscript
  • Viet Nguyen on Keep up with COVID-19 though Domino!
  • Viet Nguyen on Keep up with COVID-19 though Domino!
  • Mark Sullivan on Looking for a HP calculator? Look no further!

My Pages

  • How to write better code in Notes

Archives

  • December 2023 (1)
  • October 2023 (2)
  • September 2023 (1)
  • June 2021 (1)
  • April 2021 (2)
  • March 2021 (1)
  • August 2020 (3)
  • July 2020 (2)
  • April 2020 (2)
  • March 2020 (1)
  • December 2019 (2)
  • September 2019 (1)
  • August 2019 (2)
  • July 2019 (2)
  • June 2019 (3)
  • April 2019 (2)
  • December 2018 (1)
  • November 2018 (1)
  • October 2018 (5)
  • August 2018 (2)
  • July 2018 (3)
  • June 2018 (2)
  • May 2018 (1)
  • April 2018 (2)
  • March 2018 (1)
  • February 2018 (2)
  • January 2018 (4)
  • December 2017 (3)
  • November 2017 (2)
  • October 2017 (2)
  • September 2017 (1)
  • August 2017 (2)
  • July 2017 (6)
  • May 2017 (4)
  • February 2017 (1)
  • January 2017 (2)
  • December 2016 (2)
  • October 2016 (3)
  • September 2016 (4)
  • August 2016 (1)
  • July 2016 (2)
  • June 2016 (2)
  • May 2016 (3)
  • April 2016 (1)
  • March 2016 (4)
  • February 2016 (2)
  • January 2016 (4)
  • December 2015 (3)
  • November 2015 (2)
  • October 2015 (1)
  • September 2015 (2)
  • August 2015 (1)
  • July 2015 (5)
  • June 2015 (2)
  • April 2015 (2)
  • March 2015 (3)
  • February 2015 (2)
  • January 2015 (10)
  • December 2014 (1)
  • November 2014 (3)
  • October 2014 (3)
  • September 2014 (13)
  • August 2014 (6)
  • July 2014 (5)
  • May 2014 (3)
  • March 2014 (2)
  • January 2014 (10)
  • December 2013 (5)
  • November 2013 (2)
  • October 2013 (5)
  • September 2013 (4)
  • August 2013 (7)
  • July 2013 (3)
  • June 2013 (1)
  • May 2013 (4)
  • April 2013 (7)
  • March 2013 (8)
  • February 2013 (9)
  • January 2013 (5)
  • December 2012 (7)
  • November 2012 (13)
  • October 2012 (10)
  • September 2012 (2)
  • August 2012 (1)
  • July 2012 (1)
  • June 2012 (3)
  • May 2012 (11)
  • April 2012 (3)
  • March 2012 (2)
  • February 2012 (5)
  • January 2012 (14)
  • December 2011 (4)
  • November 2011 (7)
  • October 2011 (8)
  • August 2011 (4)
  • July 2011 (1)
  • June 2011 (2)
  • May 2011 (4)
  • April 2011 (4)
  • March 2011 (7)
  • February 2011 (5)
  • January 2011 (17)
  • December 2010 (9)
  • November 2010 (21)
  • October 2010 (4)
  • September 2010 (2)
  • July 2010 (3)
  • June 2010 (2)
  • May 2010 (3)
  • April 2010 (8)
  • March 2010 (3)
  • January 2010 (5)
  • November 2009 (4)
  • October 2009 (7)
  • September 2009 (1)
  • August 2009 (7)
  • July 2009 (1)
  • June 2009 (4)
  • May 2009 (1)
  • April 2009 (1)
  • February 2009 (1)
  • January 2009 (3)
  • December 2008 (1)
  • November 2008 (1)
  • October 2008 (7)
  • September 2008 (7)
  • August 2008 (6)
  • July 2008 (5)
  • June 2008 (2)
  • May 2008 (5)
  • April 2008 (4)
  • March 2008 (11)
  • February 2008 (10)
  • January 2008 (8)

Categories

  • AppDev (10)
  • Blogging (11)
    • WordPress (5)
  • Design (5)
    • Graphics (1)
    • UI/UX (2)
  • Featured (5)
  • Financial (2)
  • Food (5)
    • Baking (3)
    • Cooking (3)
  • Generic (11)
  • History (5)
  • Hobbies (10)
    • LEGO (4)
    • Photography (4)
  • Humor (1)
  • IBM/Lotus (178)
    • #Domino2025 (14)
    • #DominoForever (8)
    • #IBMChampion (46)
    • Administration (7)
    • Cloud (7)
    • CollabSphere (9)
    • Community (49)
    • Connect (33)
    • ConnectED (12)
    • Connections (3)
    • HCL (15)
    • HCL Master (1)
    • IBM Think (1)
    • Lotusphere (46)
    • MWLUG (25)
    • Notes/Domino (99)
      • Domino 11 (7)
    • Sametime (8)
    • Verse (14)
    • Volt (3)
    • Watson (6)
  • Life (8)
  • Microsoft (7)
    • .NET (2)
    • C# (1)
    • Visual Studio (1)
  • Movies (3)
  • Old Blog Post (259)
  • Personal (23)
  • Programming (84)
    • App Modernization (11)
    • Formula (4)
    • Lotusscript (47)
    • NetSuite (4)
      • SuiteScript (3)
    • node.js (4)
    • XPages (4)
  • Reviews (9)
  • Sci-Fi (4)
  • Software (24)
    • Flight Simulator (2)
    • Games (4)
    • Open Source (2)
    • Utilities (6)
  • Technology (37)
    • Aviation (3)
    • Calculators (2)
    • Computers (6)
    • Gadgets (7)
    • Mobile Phones (7)
    • Science (3)
    • Tablets (2)
  • Travel (7)
    • Europe (1)
    • Texas (2)
    • United States (1)
  • Uncategorized (16)
  • Web Development (50)
    • Frameworks (23)
      • Bootstrap (14)
    • HTML/CSS (12)
    • Javascript (32)
      • jQuery (23)
  • Prev
  • 1
  • …
  • 3
  • 4
  • 5

Administration

  • Log in
  • Entries feed
  • Comments feed
  • WordPress.org

Tracking

Creeper
MediaCreeper
  • Family Pictures
© TexasSwede 2008-2014